Deploying in Starburst Enterprise Platform (SEP) on AWS
These instructions describe how to deploy the Aerospike Trino connector in Starburst Enterprise on AWS. Starburst Enterprise is an enterprise-ready distribution of open source Trino (formerly PrestoSQL).
The Aerospike connector does not support the following Starburst Enterprise features:
- Materialized Views
- Caching Service
- Atlas Integration
- Data Catalog - AWS Glue and Hive Metastore
Prerequisites
- A valid Starburst Enterprise license.
- Python 3.8.
- Java SE 11
- Verify the Trino version in the Starburst Enterprise release that you plan to use. The corresponding connector release is located here.
Provision EC2 instance
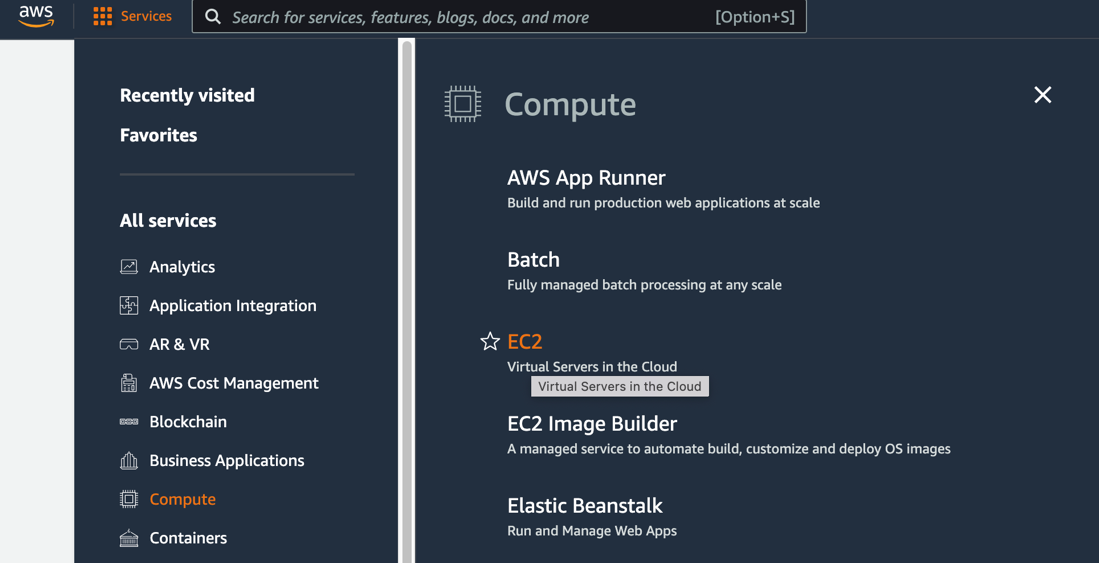
Log into the AWS Management Console, then click Services > Compute > EC2.
Select Launch Instances.

Choose AMI > Ubuntu Image 20.04 XXX > 64 Bit(X86) > Select.

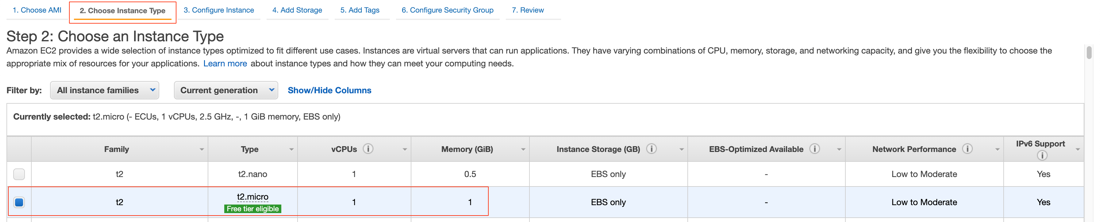
Select Choose Instance Type > t3.2xlarge.
Select Next: Configure Instance Details.

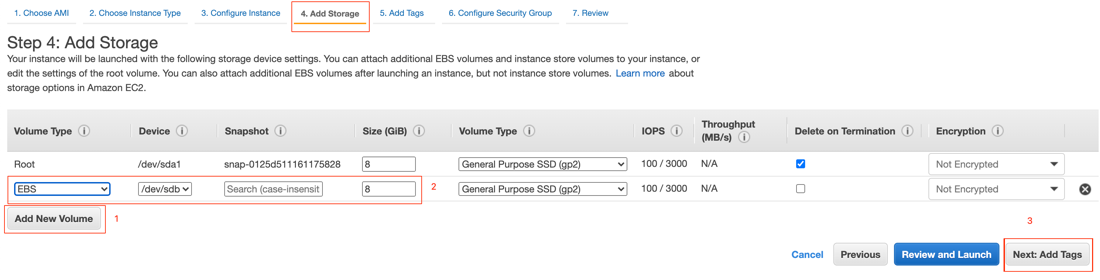
Go to Add Storage > Add New Volume and check the specified settings. If they look good, click Next: Add Tags.
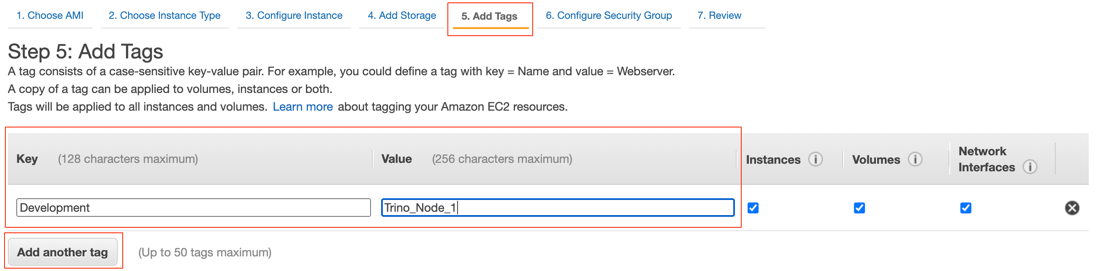
Choose Add Tags > Add Tag then enter the appropriate value for Key and Value. For example, Development and Starburst_Node_Dev_X or QA and Starburst_Node_QA_X.
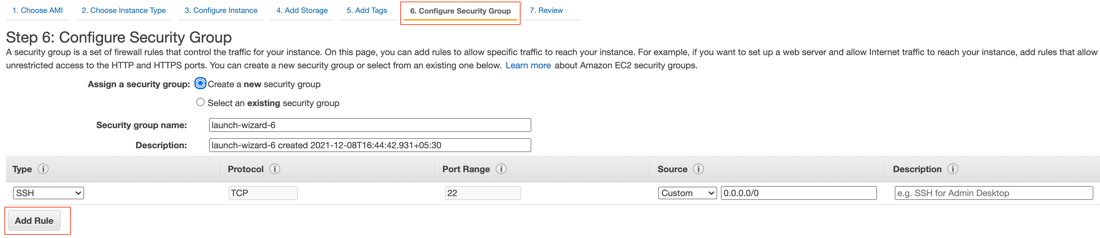
At the bottom of the screen, click Next: Configure Security Group.
If you need ports other than SSH, like port 8080 or 3000-3003, select Configure Security Group > Add Rule. Add rules to allow the necessary ports.
Click Review and Launch.

Review the settings, then click Launch.

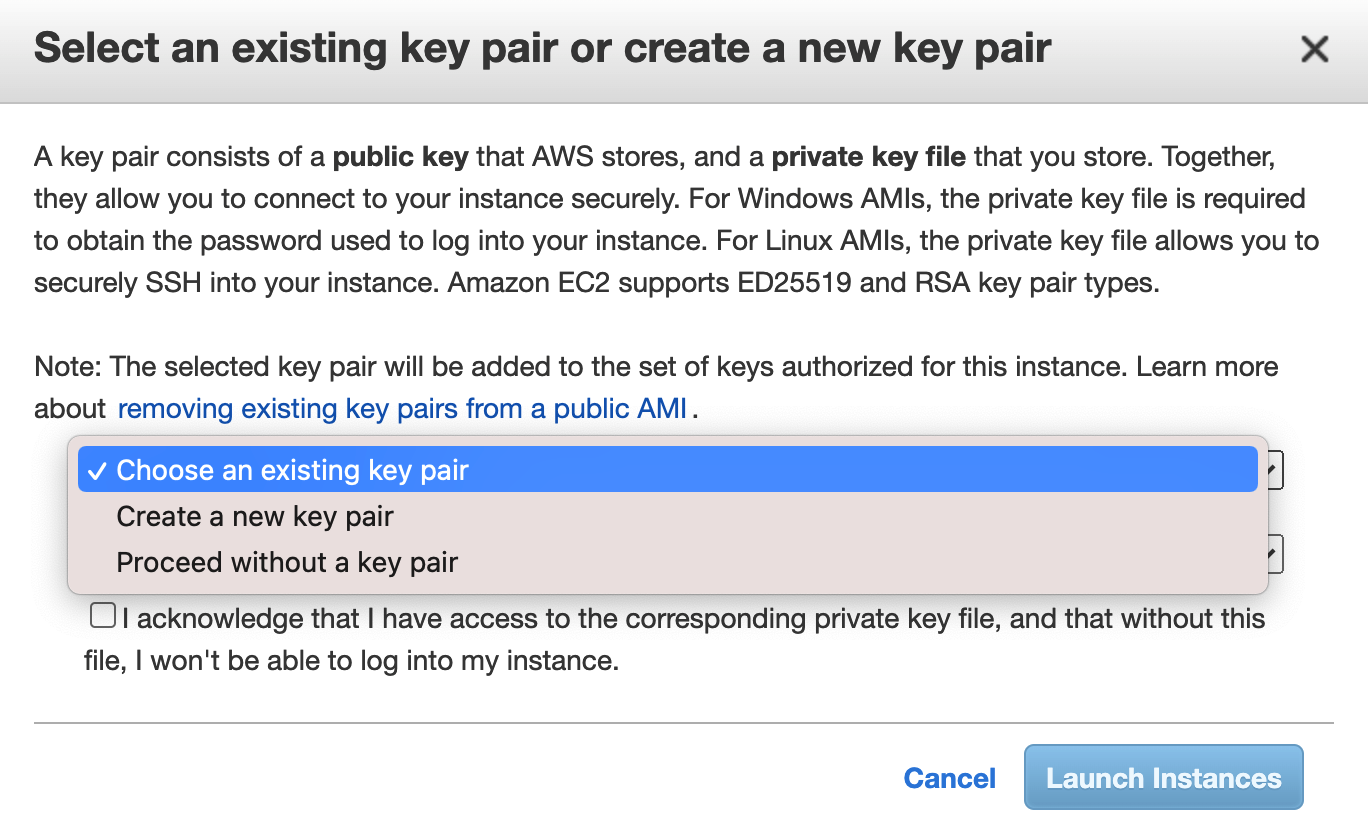
Select one of the options:
- Choose an existing key pair
- Create a new key pair
- Proceed without a key pair
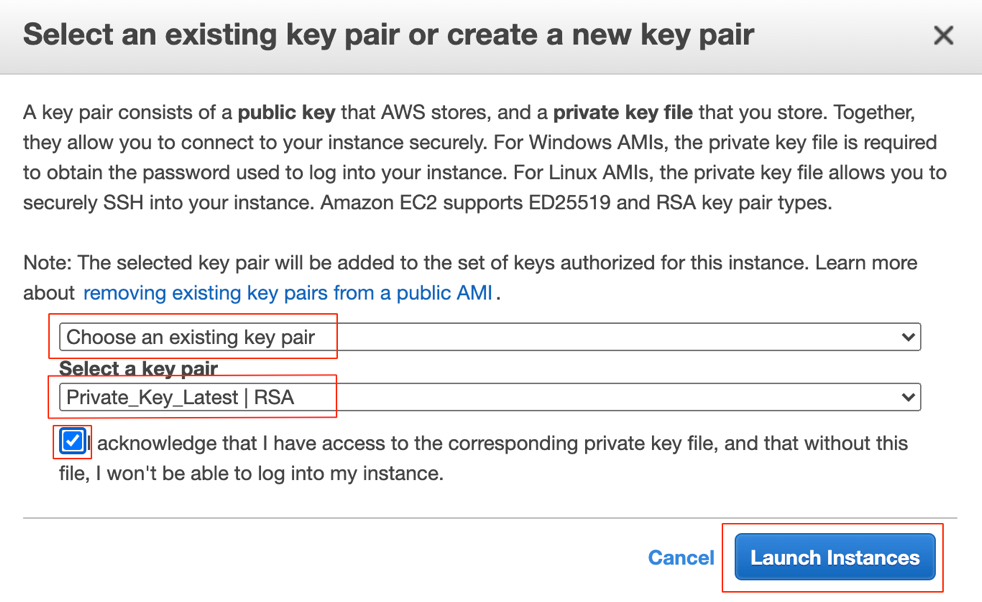
If existing keys are available, select Choose an existing key pair, select the Public/Private key, tick the box to confirm you have access, then click Launch Instances.
Deploy Starburst and Aerospike
Pick the public IP address of the recently-created instance before proceeding to the next steps from the AWS console. For the following examples, we assume the IP address is 192.0.2.0.
Use PuTTY (Windows) or Terminal (Mac) to log into the configured instance.
The following steps have been tested in Terminal on Mac.
ssh -i ~/Downloads/Private_Key_Latest.pem ubuntu@192.0.2.0
Install Java and Python, if they are not pre-configured on your instance.
sudo apt update
sudo apt-get install openjdk-11-jdk
sudo apt install python3.8
Download Starburst Enterprise LTS version. As of publication of this documentation, Release 370-e LTS is the latest version.
Upload it to the /home/ubuntu directory on your instance.
Go to the /home/ubuntu directory on your instance and install UUID.
cd /home/ubuntu
sudo apt-get install uuid
Run the UUID command and capture the node ID for node.properties.
uuid
Upload all relevant files to the home/ubuntu directory, including:
- A valid Starburst Enterprise license.
- The Starburst Enterprise download in .tar.gz format.
Make the /etc/sep directory and copy over your license key.
sudo mkdir -p /etc/sep
cd /etc/sep
sudo cp /home/ubuntu/*.license .
Move to the /home/ubuntu directory, then uncompress the Starburst installation package.
cd /home/ubuntu
tar xvfz starburst-enterprise-370-e.1.tar.gz
Move the uncompressed Starburst file to /opt/starburst, then go to that directory and create a symlink.
sudo mv starburst-enterprise-370-e.1 /opt/starburst
cd /opt/starburst
sudo ln -s /etc/sep etc
Go to the /opt/starburst/plugin directory and make a directory for Aerospike.
cd /opt/starburst/plugin/
sudo mkdir aerospike
Copy all the JAR files from the Aerospike Trino Connector download into the new /opt/starburst/plugin/aerospike directory.
Create a /var/trino/data directory and give it read/write/execute permissions for all users.
mkdir -p /var/trino/data
sudo chmod 777 /var/trino/data
Move into the /etc/sep directory and edit the node.properties file.
/etc/sep
sudo vi node.properties
Set the following configurations. For node.id use the UUID you captured previously with the uuid command.
node.environment=production
node.id=XXXXXXXXXXXX ## UUID captured previously
node.data-dir=/var/trino/data
Save and exit the file.
Edit jvm.config.
sudo vi jvm.config
Now configure Trino in Starburst Enterprise. Refer to Trino Configuration for more details.
Here's a sample configuration:
-server
-Xmx16G
-XX:-UseBiasedLocking
-XX:+UseG1GC
-XX:G1HeapRegionSize=32M
-XX:+ExplicitGCInvokesConcurrent
-XX:+ExitOnOutOfMemoryError
-XX:+HeapDumpOnOutOfMemoryError
-XX:-OmitStackTraceInFastThrow
-XX:ReservedCodeCacheSize=512M
-XX:PerMethodRecompilationCutoff=10000
-XX:PerBytecodeRecompilationCutoff=10000
-Djdk.attach.allowAttachSelf=true
-Djdk.nio.maxCachedBufferSize=2000000
Save and exit the file.
Edit config.properties.
vi config.properties
Set the cluster configurations, using one of the two following options.
Option 1: Single-Node Deployment
coordinator=true
node-scheduler.include-coordinator=true
http-server.http.port=8080
query.max-memory=50GB
query.max-memory-per-node=1GB
discovery.uri=http://[coordinator node IP address]:8080
Option 2: Multi-Node Deployment
If you plan to use one or more worker nodes, one set of configurations applies to the coordinator node, and a second set applies to each worker node.
On the coordinator node:
coordinator=true
node-scheduler.include-coordinator=true
http-server.http.port=8080
query.max-memory=50GB
query.max-memory-per-node=1GB
discovery.uri=http://[coordinator node IP address]:8080
On each worker node:
coordinator=false
query.max-memory=50GB
query.max-memory-per-node=1GB
discovery.uri=http://[coordinator node IP address]:8080
You can use any DevOps automation tool to automate applying configurations to worker nodes.
Save and exit the config.properties file.
Edit log.properties.
sudo vi log.properties
Set the following configuration.
io.trino=INFO
Save and exit the file.
Create a catalog directory and move into it.
sudo mkdir catalog
cd catalog
Create a file named aerospike.properties.
sudo vi aerospike.properties
Set your desired configurations. See Connector Configuration Properties for available settings.
Example configuration file:
connector.name=aerospike
aerospike.hostlist=xx.xx.xx.xx:3000,yy.yy.yy.yy:3000,zz.zz.zz.zz:3000
## aerospike node list
aerospike.split-number=8
aerospike.strict-schemas=false
aerospike.record-key-hidden=false
aerospike.enable-statistics=true
aerospike.insert-require-key=true
aerospike.table-desc-dir=/etc/trino/aerospike
aerospike.clientpolicy.tls.enabled=false
Save and exit the file.
By default, the Trino connector uses heuristics to rapidly infer schemas without the need for you to specify them. However, you can choose to specify the schema by creating a table definition. See Specifying Trino Schemas for more information.
Go to /usr/bin then run the Starburst launcher.
cd /usr/bin
python3 /opt/starburst/bin/launcher.py run
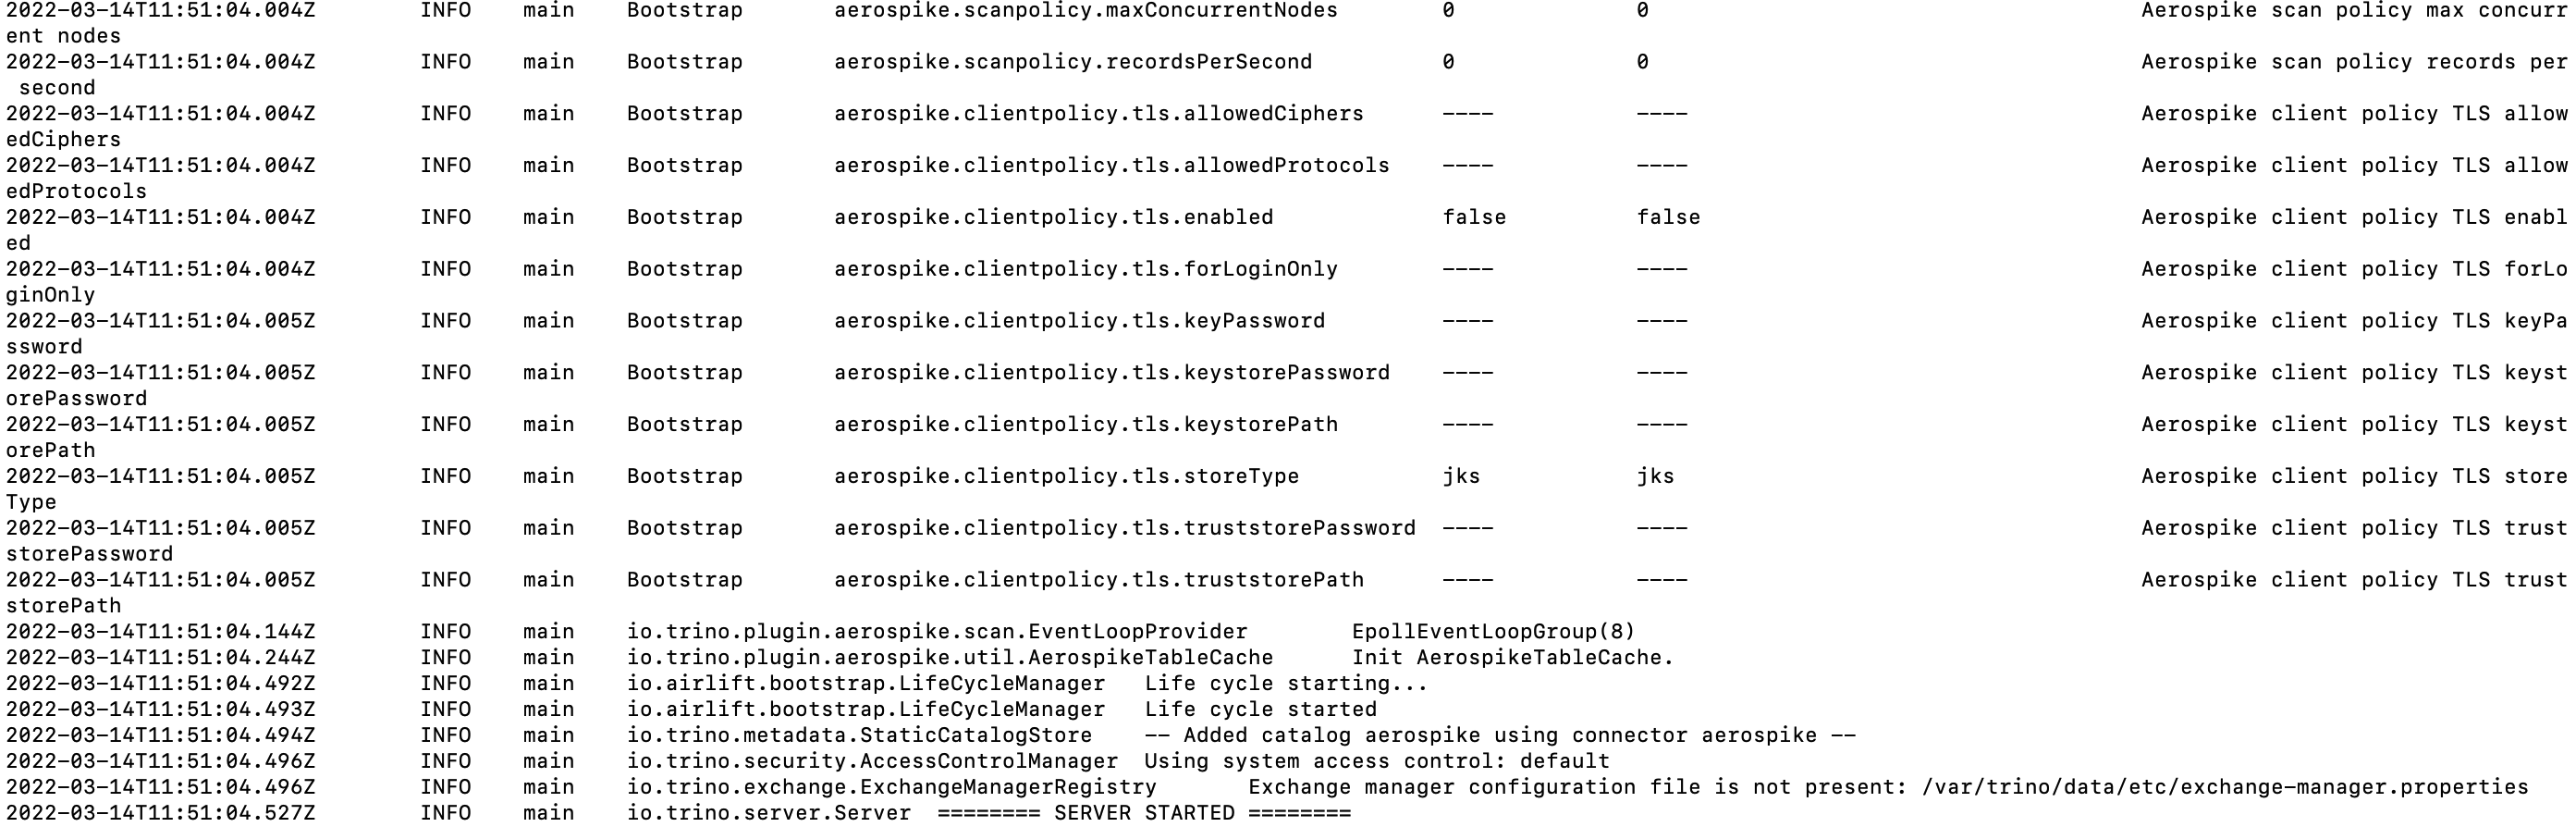
Watch the Server Started messages and troubleshoot any errors that may arise.
Although we have tested connecting to Starburst Enterprise with DBeaver, we encourage you to try out other Starburst clients based on your needs. See the supported SQL statements and Examples for how to develop SQL queries to generate insights from Aerospike data.