Install using Quickstart
Aerospike provides CloudFormation templates to quickly provision an entire Aerospike cluster with the recommended settings.
The quickest and least-complicated way to get Aerospike running on EC2 is through Aerospike's provided CloudFormation templates. With these, you will be able to start clusters in your existing VPCs or in new VPCs, with various instance types.
These templates allow you to use the Aerospike Database Enterprise Edition with default parameters. You may eventually want to configure a variety of settings.
You can take advantage of this with our Quickstart Offering.
Watch the Setup Video
Common Steps
Determine the instance types you'd like.
Determine feature key file for the deployment, default key in CFT works only for single node deployment.
Create a namespace file. If you do not create one, then Aerospike will be deployed with default RAM namespaces
testandbar. They may be incorrectly sized for the instances you choose.
This file specifies the namespaces the cluster has, the RAM and storage configuration, and other parameters such as replication. If you are familiar with Aerospike configuration files, these are the namespace stanzas of a configuration file, and will be appended to the end of the aerospike.conf file as-is.
The CloudFormation template works best with one namespace. Only one persistent namespace can be defined, as the template is limited to one ephemeral storage device and one EBS volume. Multiple namespaces can be used if the persistence is not required by dividing the ram and/or devices amongst namespaces.
If you require persistence, this is best done with EBS. EBS volumes are always type gp2 and attached under /dev/sdg. An ephemeral volume is always available (if the instance type has them) under /dev/sdf .
The configuration file must be sensible for your instance. If your cluster fails to start, or behaves poorly, the reason is likely to be the namespace configuration does not match the properties of the instance type, the EBS configuration and size, and ephemeral storage configuration.
Deploy Quick Start
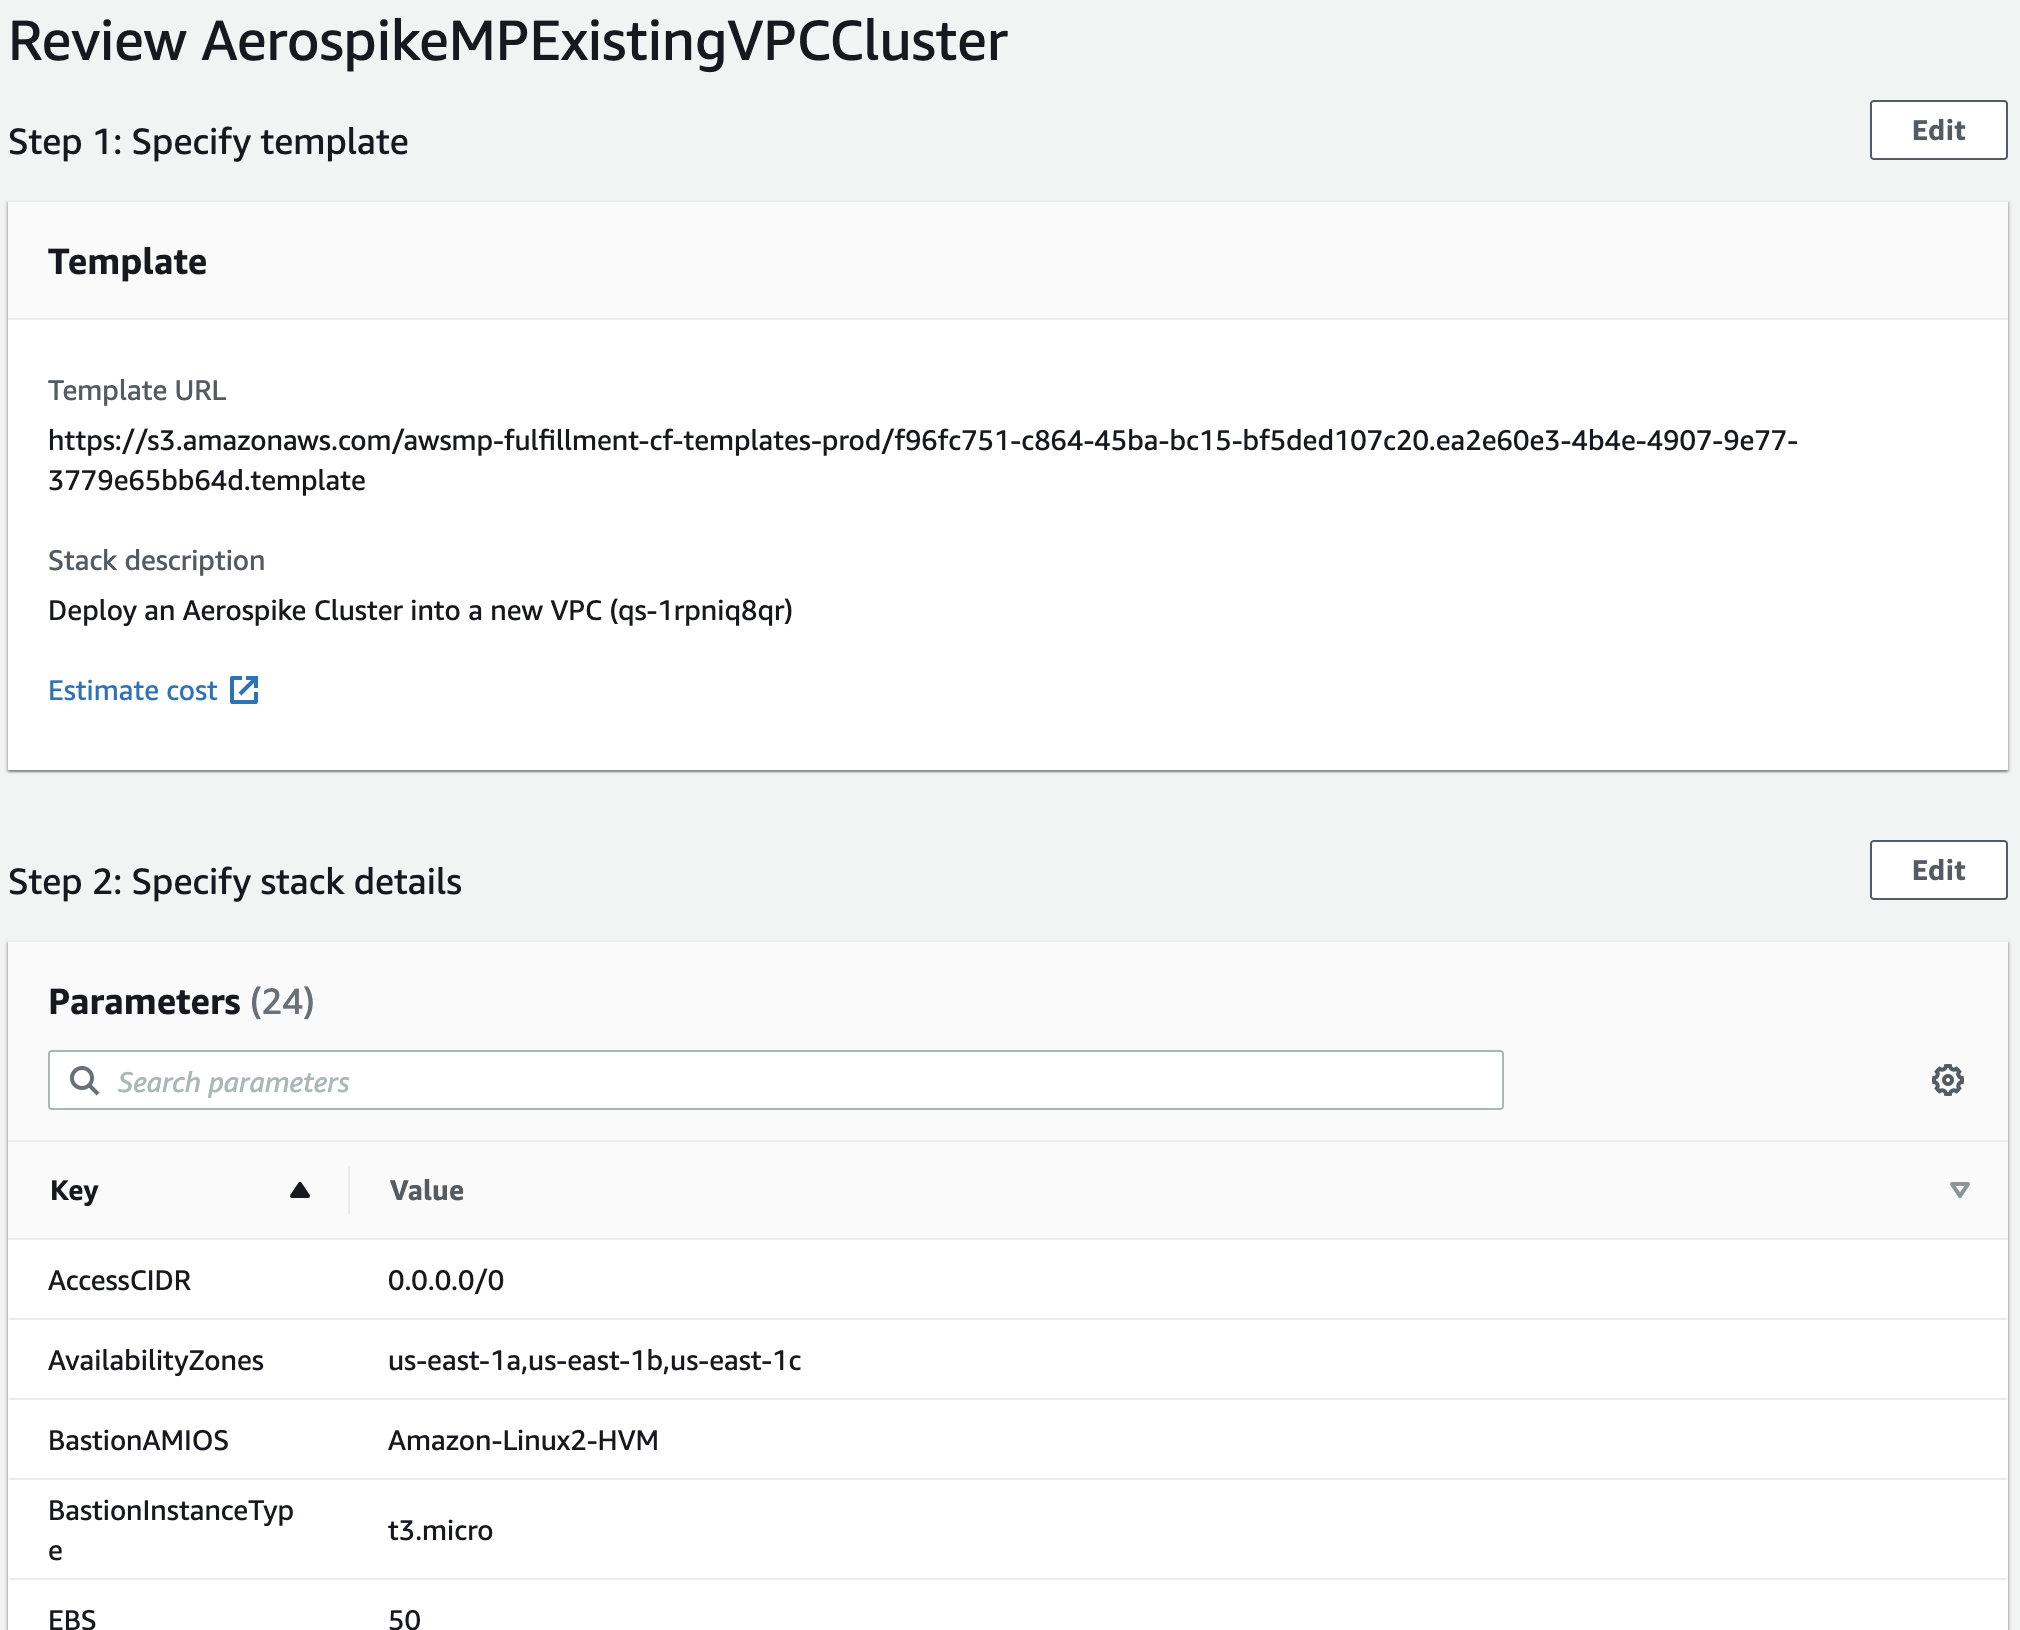
Navigate to the Aerospike AWS Quick Start offering and go to the Deployment Steps section. Follow the directions to subscribe to the Aerospike AMI (Amazon Machine Images), and then choose to launch in a new VPC or an existing VPC.
Specify details
CloudFormation will ask you for a number of parameters.
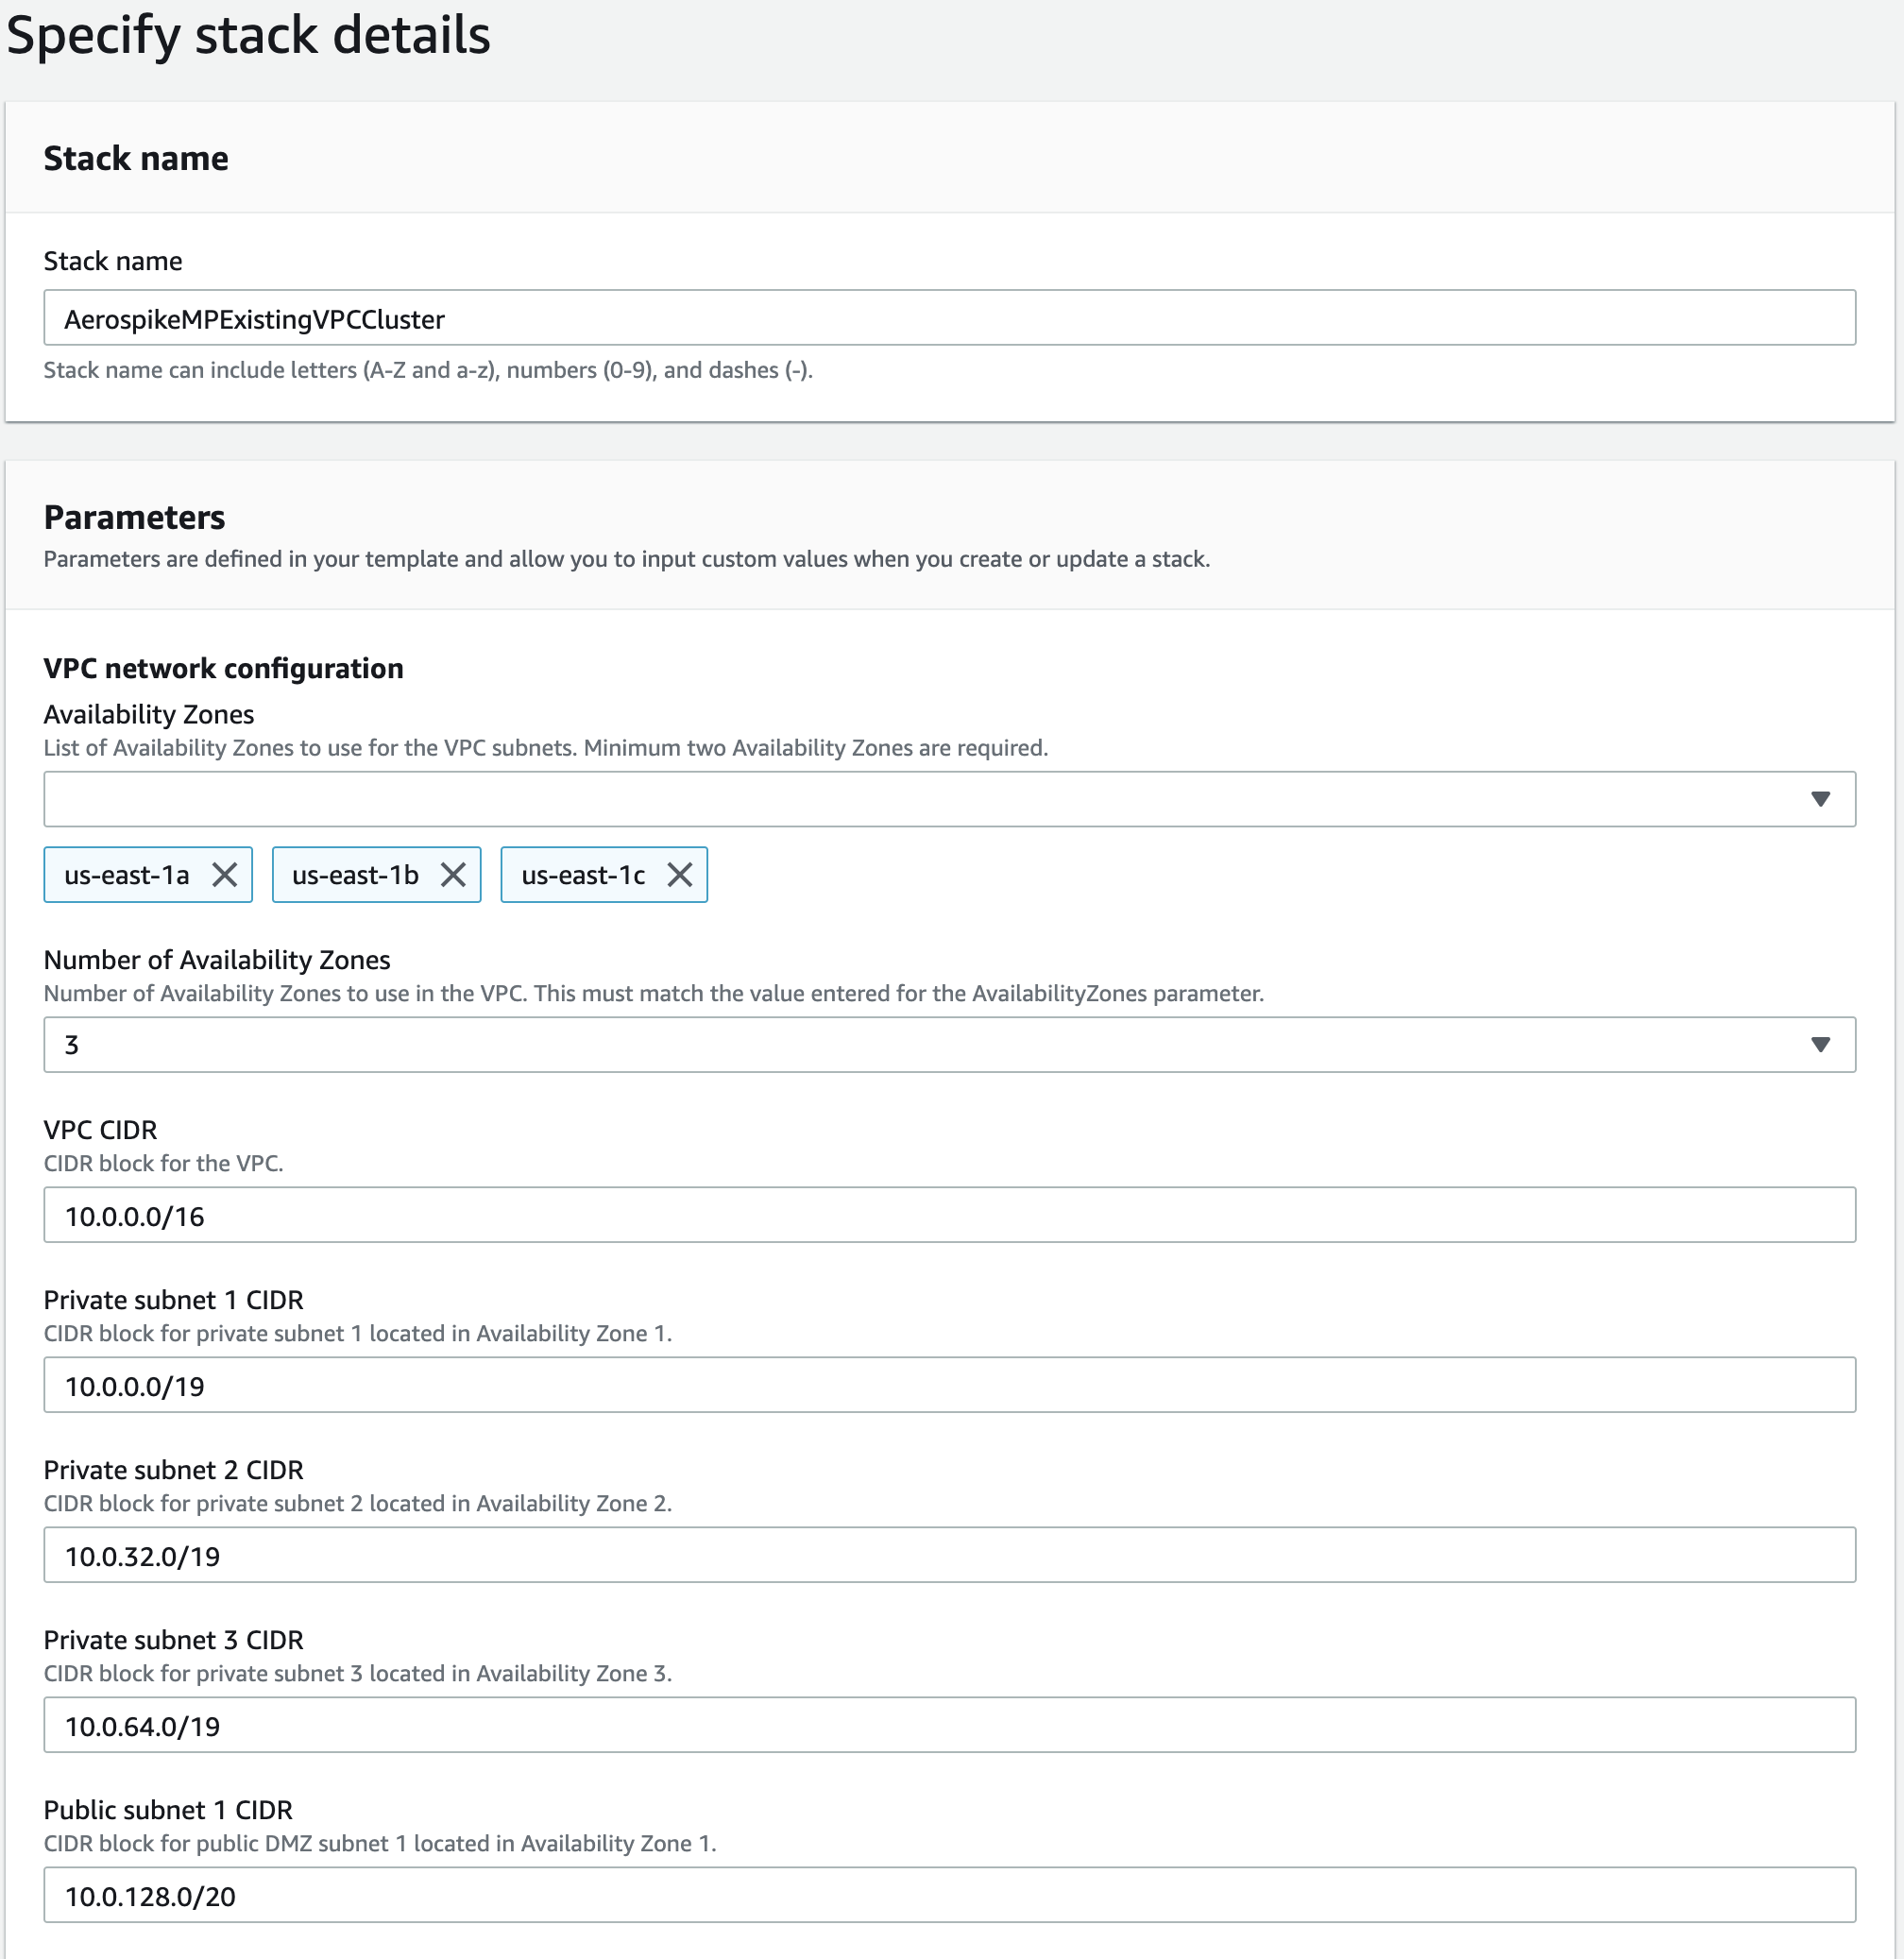
Give a name to your stack.
Select availability zones and specify the number of availability zones that you selected.
Select CIDR block for VPC and subnets if you don't want to use default values.
Enter the CIDR block from which you permit SSH access. You can use many online sites like whatismyip to find out your IP. For single IP addresses appending /32 is required. A "wide open" SSH configuration is "0.0.0.0/0". Only 1 entry is permitted.
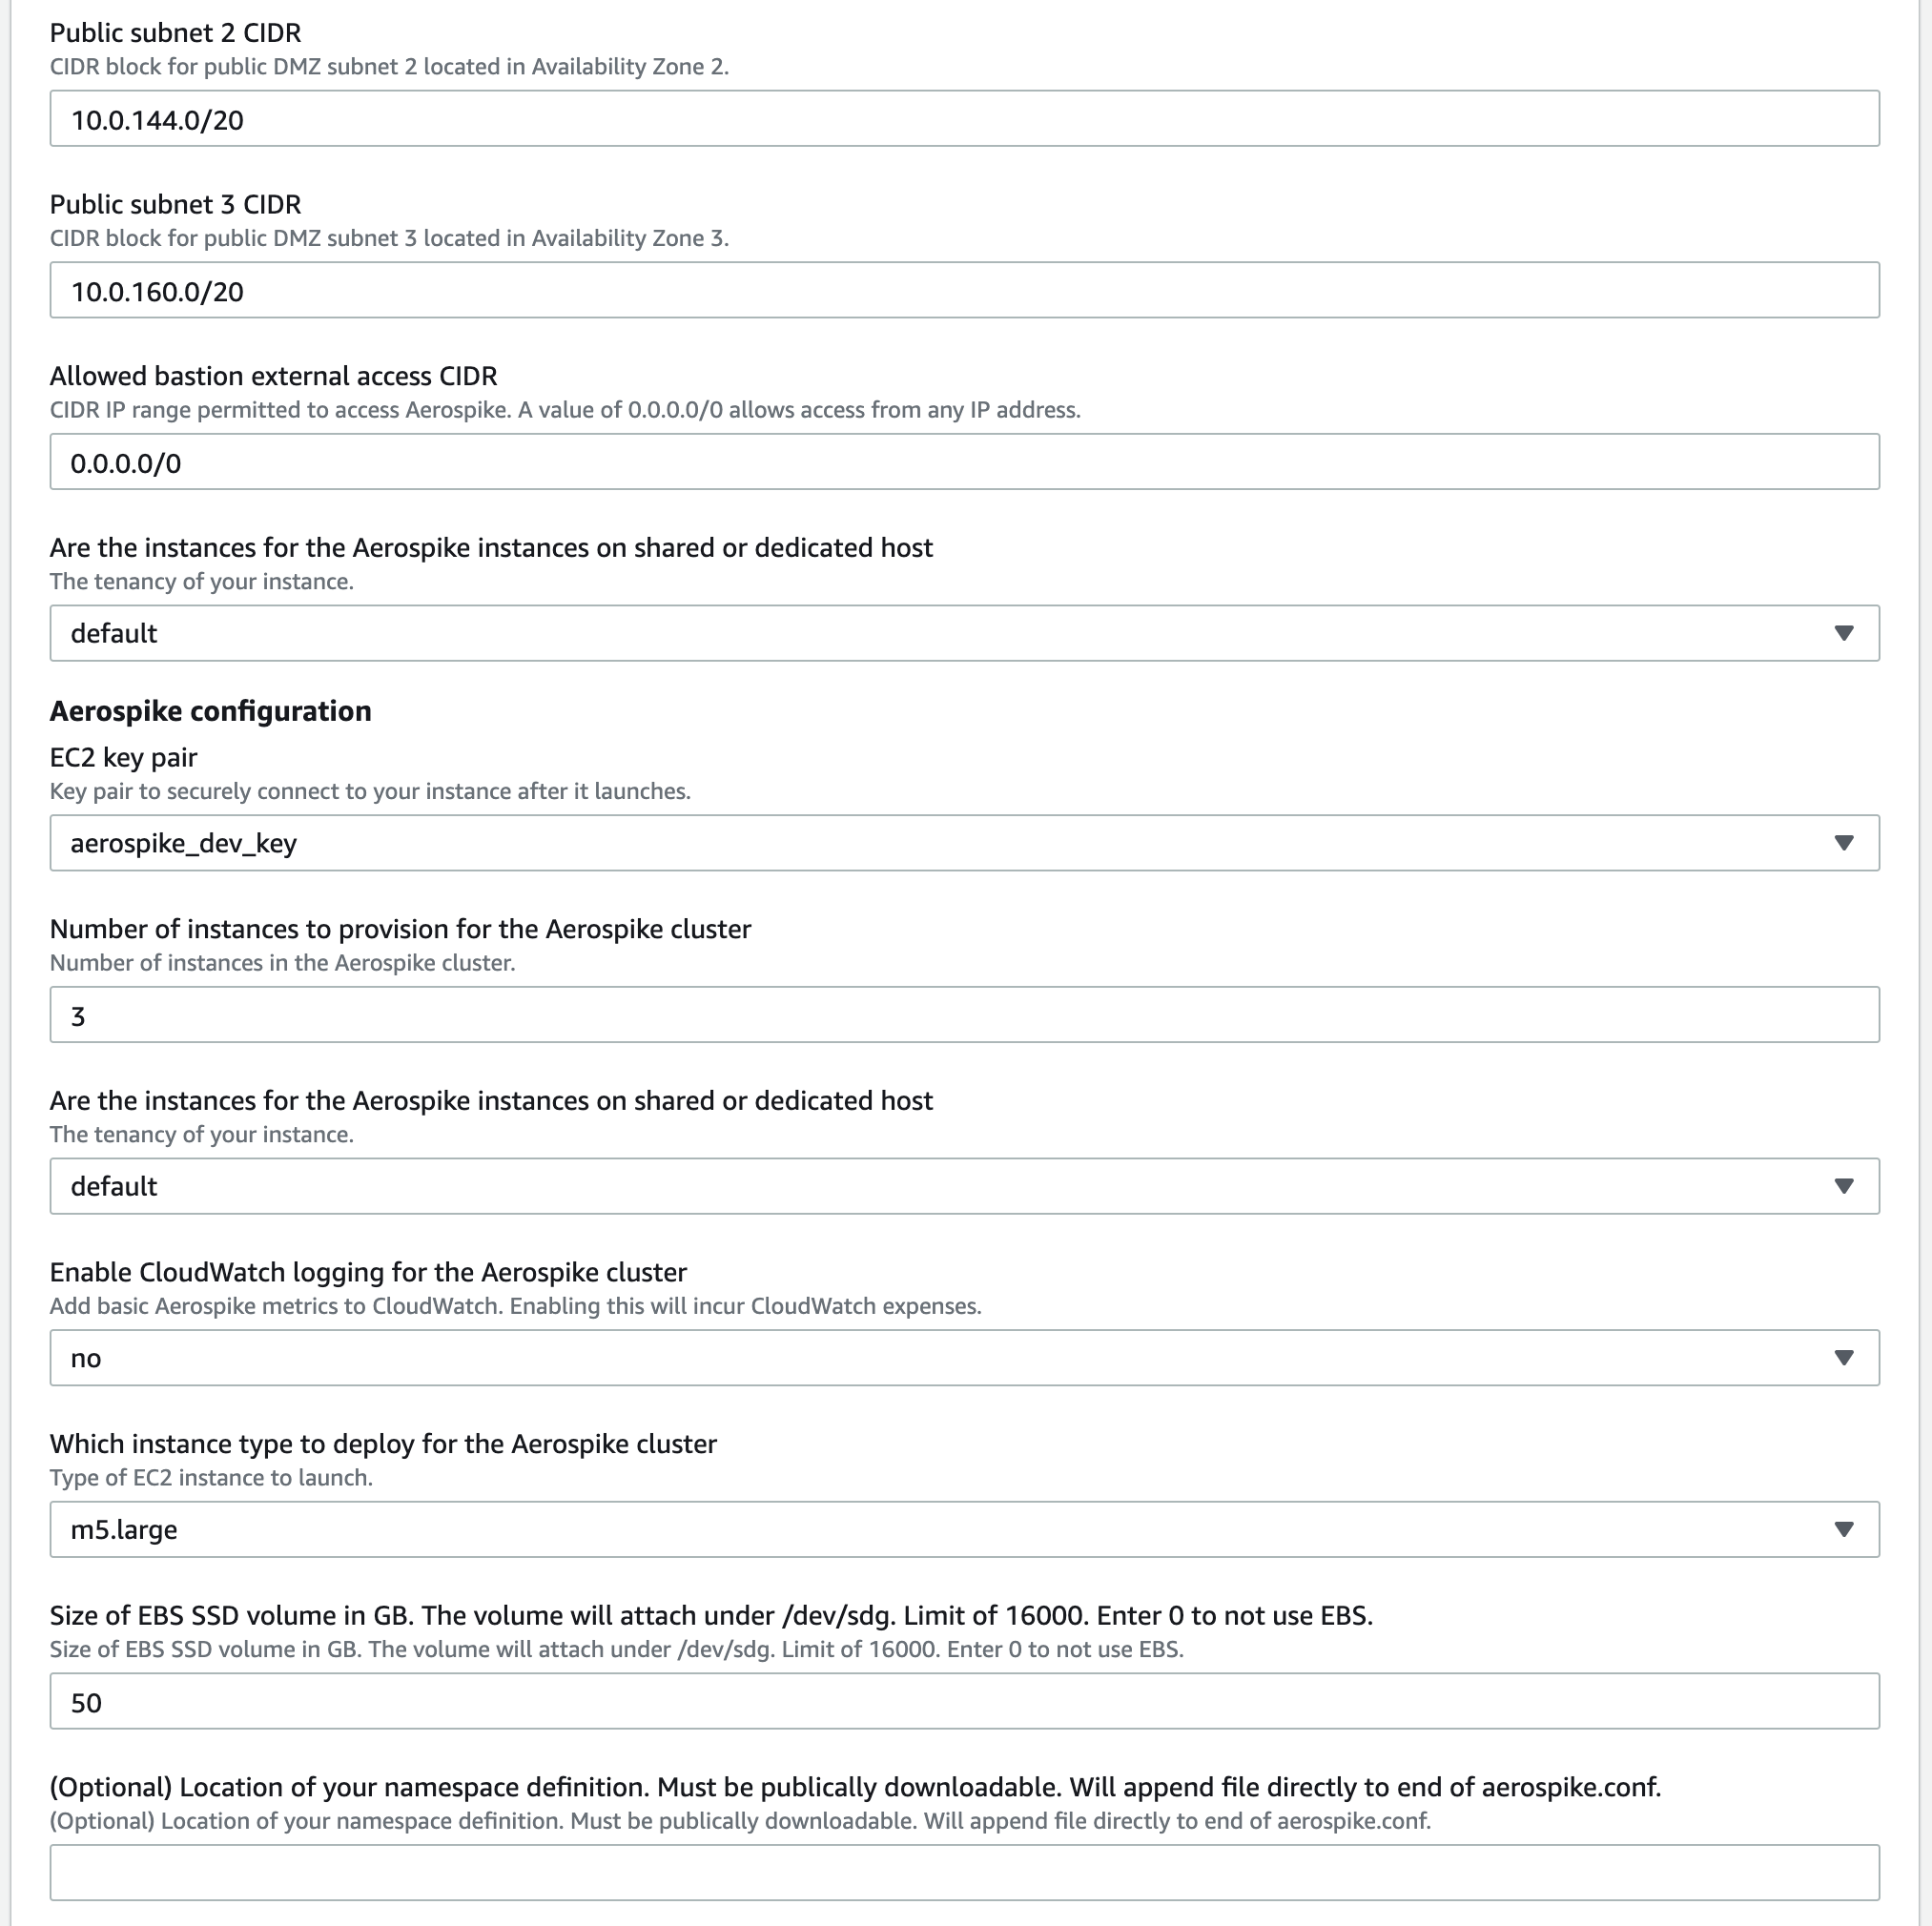
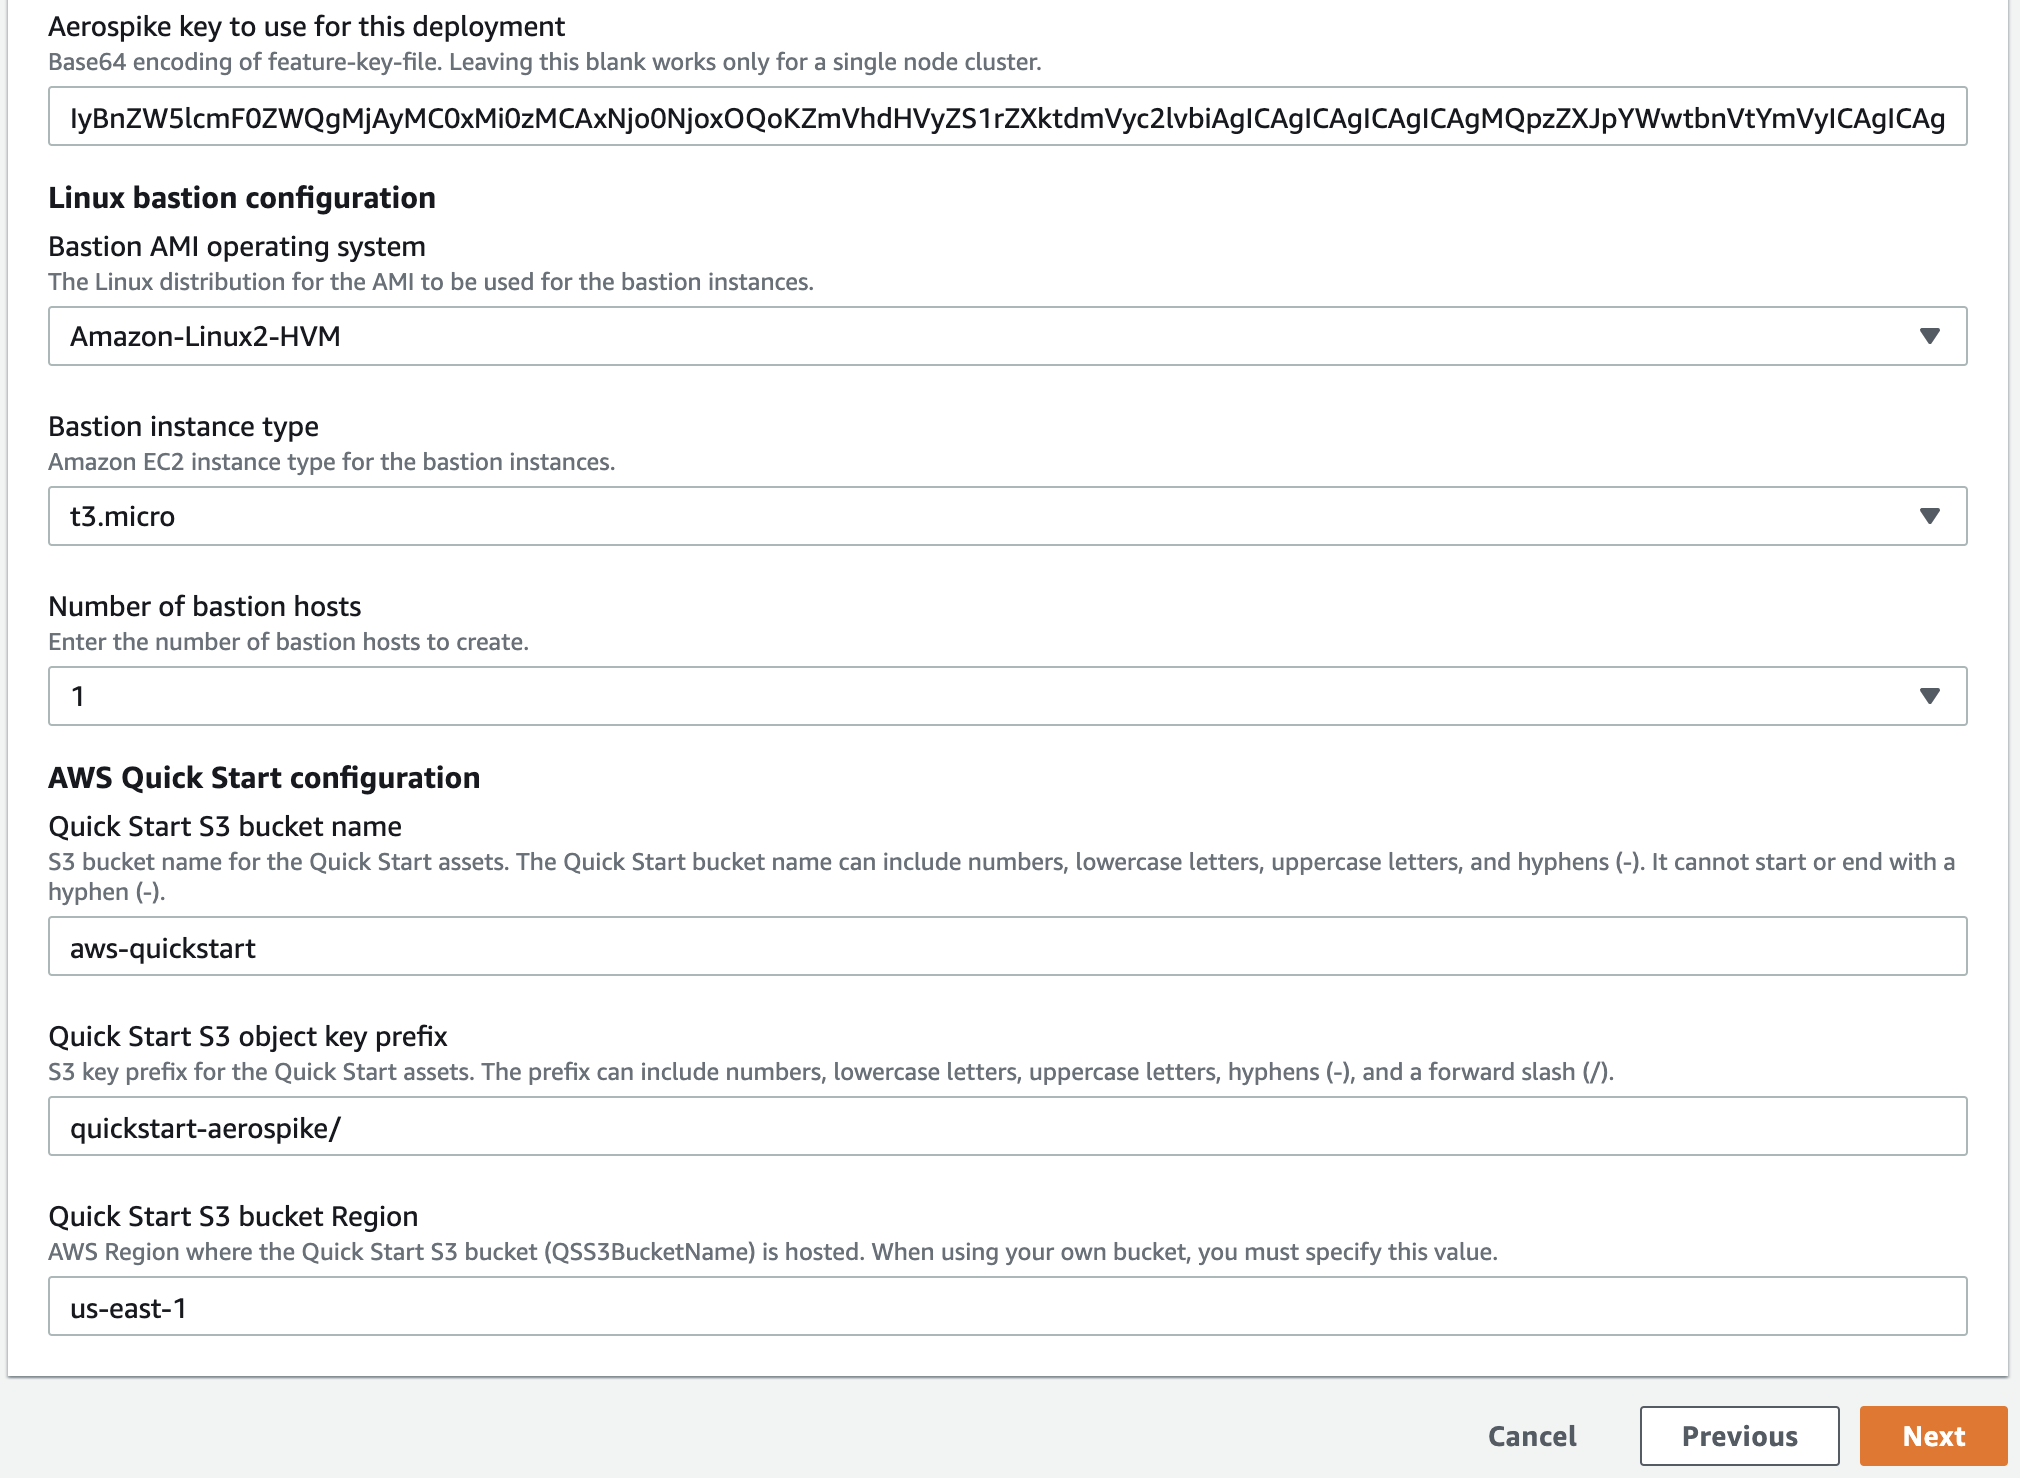
Choose a valid existing keypair. If you don't have a keypair in AWS already, create one first
In the field Number of instances to provision for the Aerospike cluster, enter the initial number of instances desired.
Choose if you'd like dedicated tenancy. There will be additional costs with this option.
In the field Enable CloudWatch logging for the Aerospike cluster, select yes to enable this logging or no to leave it disabled.. This extra AWS expense may be worth enabling if you use Cloudwatch for service monitoring.
Statistics are: Cluster Integrity, Free Memory, Free Disk and Number of Objects
In the field Which instance type to deploy for the Aerospike cluster, select an instance type. For more info on which instance to use, refer to Aerospike AWS Capacity Planning.
Choose EBS size. If you chose persistence in EBS when you specified your cluster, enter the correct size from your sizing step. Enter 0 to not use EBS volumes.
(Optional) Specify the URL of your namespace file. This is usually an S3 URL, as recommended above. If you skip this step, two RAM namespaces
testandbarare defined. They might be incorrectly sized for the instance types you selected.In the field Aerospike key to use for this deployment, paste the base64-encoding of your feature-key file. Leave this field blank only if you plan to create a single-node Aerospike cluster.
If deploying to an existing VPC, choose the VPC and the subnet within that VPC.
Click next.
Specify tags
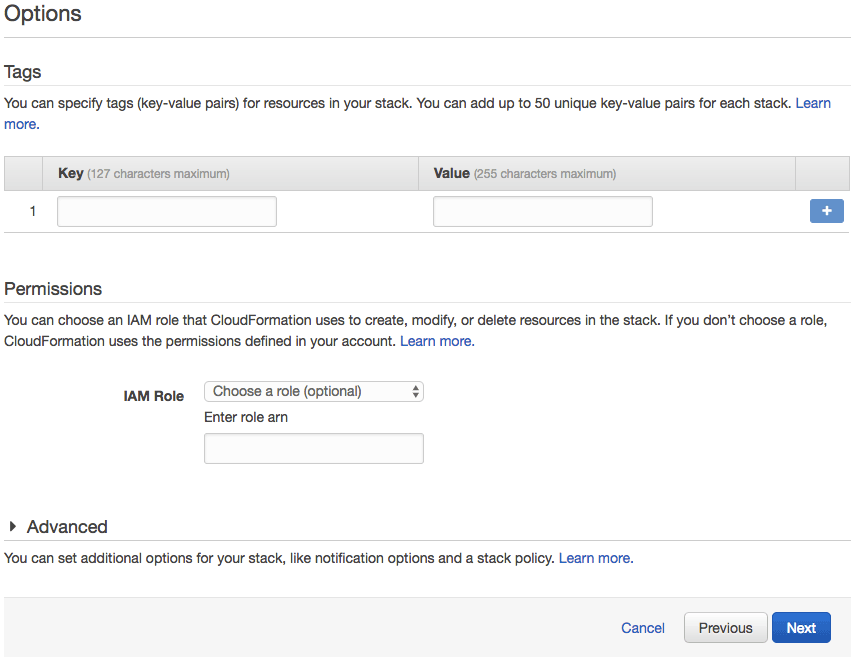
Enter user-defined tags desired. The template does not require any tags of this sort.
It is useful to define a Name (case sensitive) tag, such that newly deployed instances have a name already when viewed in the EC2 console.
Review
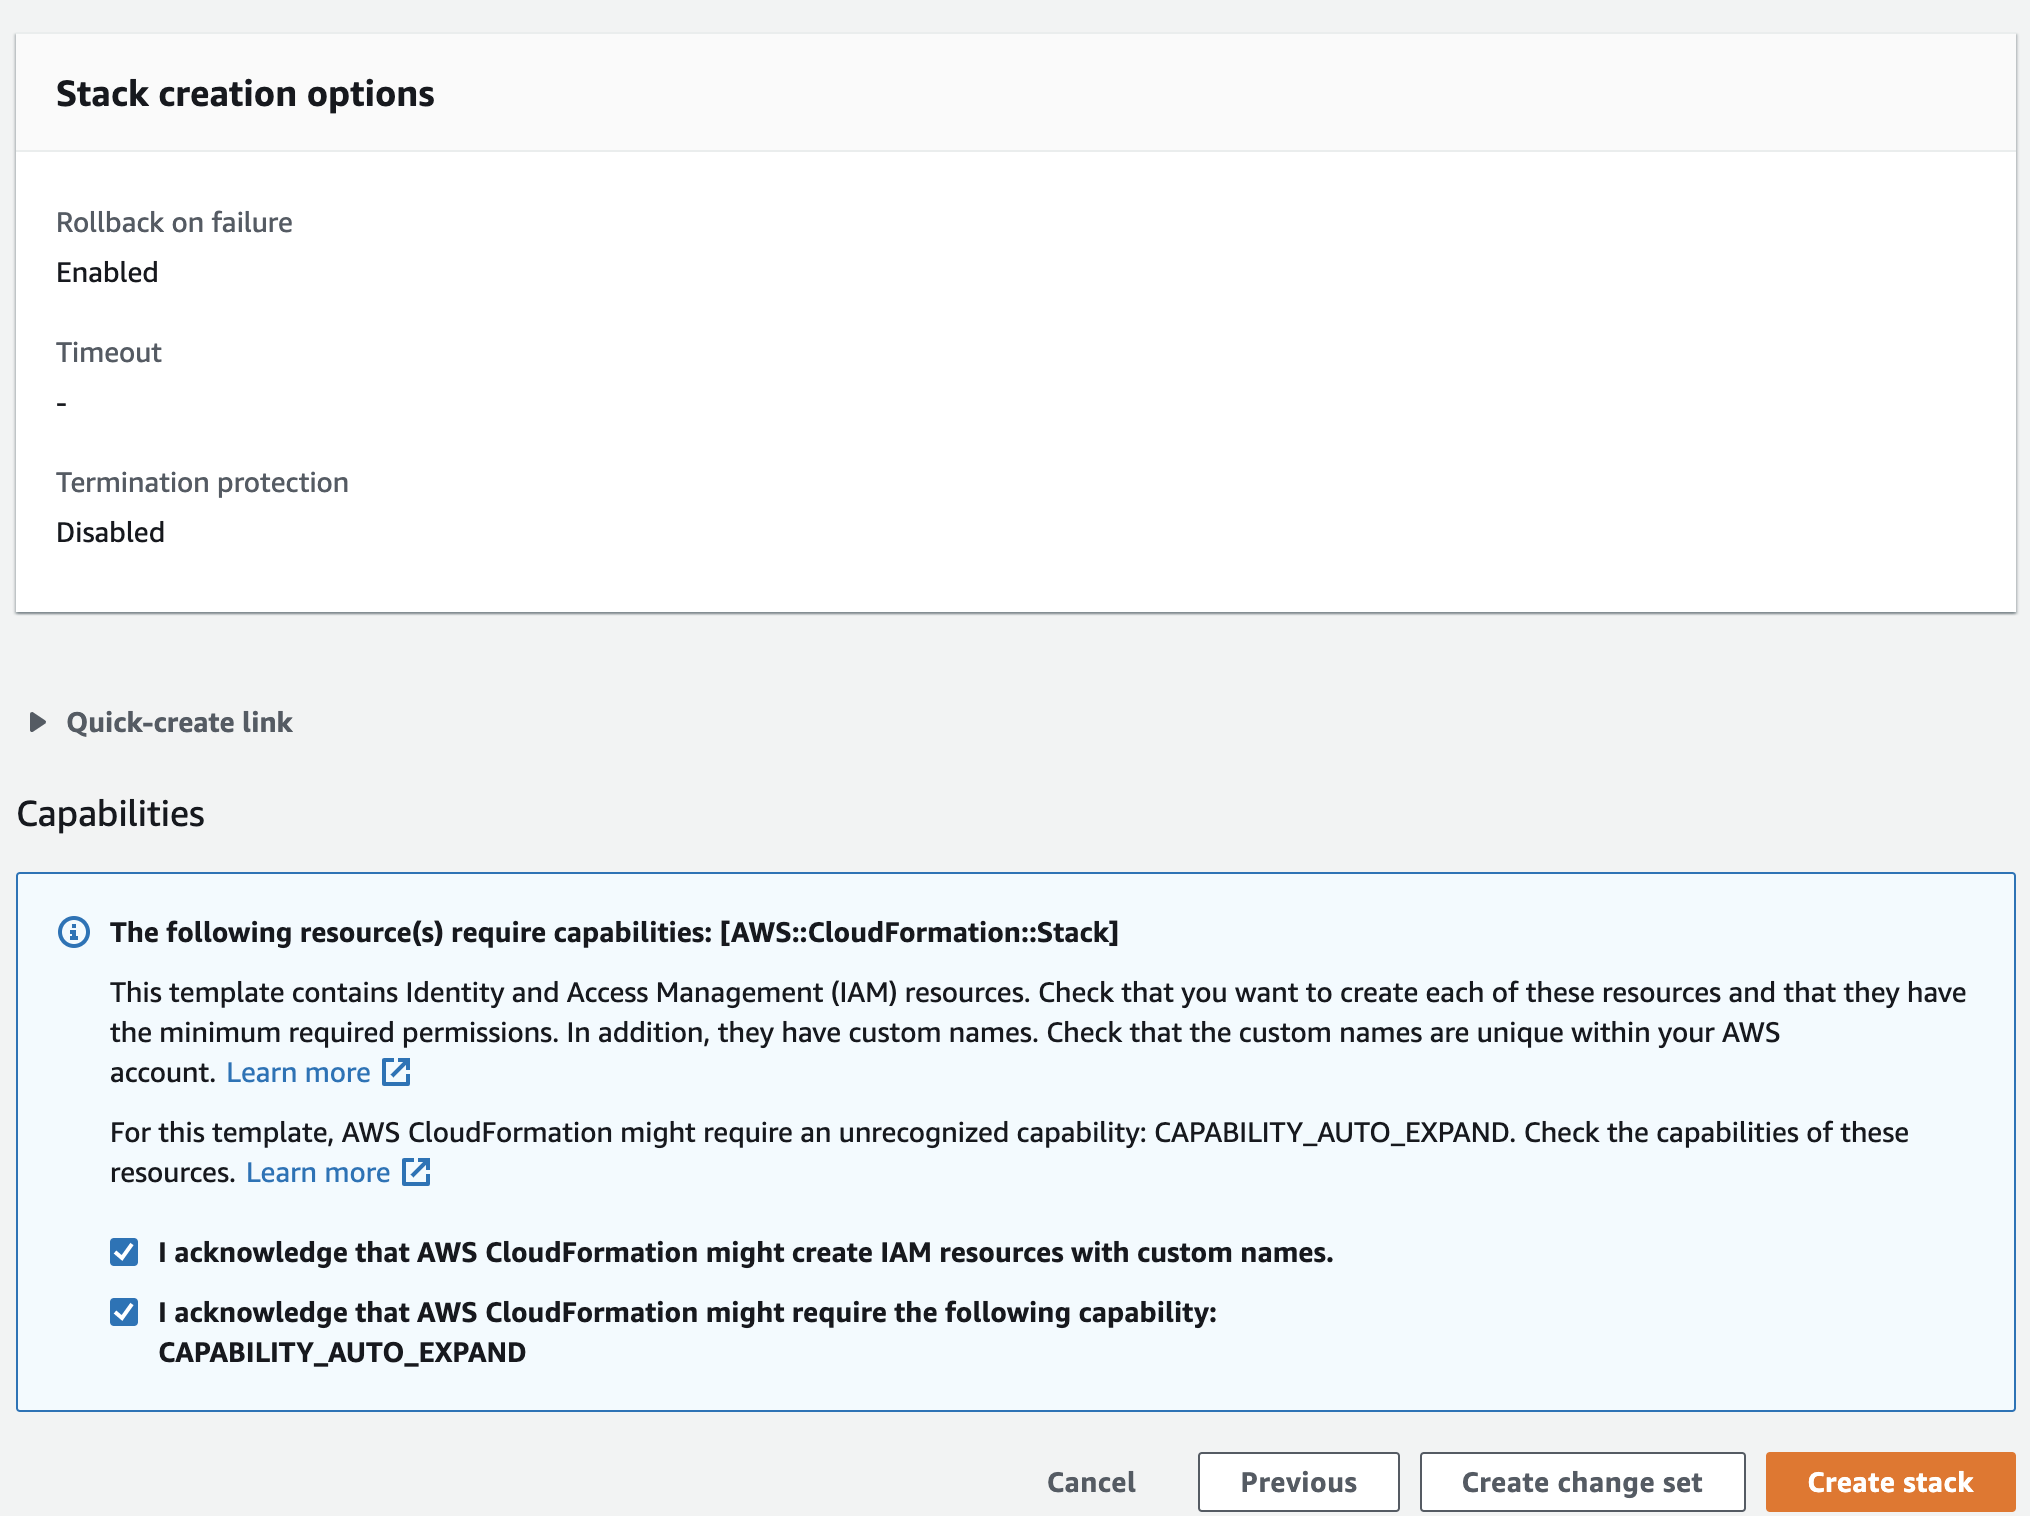
Check "I acknowledge that this template might cause AWS CloudFormation to create IAM resources." This is required for cluster discovery.
Check "I acknowledge that this template might require the following capability : CAPABILITY_AUTO_EXPAND." This is required because the stack template contains macros and nested stacks.
See the Architecture section for details.
Review and click Create stack.
Confirm cluster
To use Aerospike tools and Aerospike client applications with your cluster, you will need the IP addresses of the bastion host and Aerospike instances.
Go to your EC2 console and find the IP addresses of the instances that were created.
Fire off some load using the Java benchmark client and watch the load with the Aerospike Monitoring Stack
System Access
SSH access is enabled on the bastion instances under the ec2-user user using the key-pair you've selected during stack creation. You are prompted to enter the IP (in CIDR format) from where you permit SSH access also during stack creation.
Architecture
Upon instance startup, instances will run a userdata script that will query AWS for instances based on the unique StackID tag CloudFormation generates. This functionality requires the ec2-describe instance policy and utilizes IAM roles for this.
This script will then determine the private IP addresses and modify the clustering section of aerospike configs to use those addresses.
This cluster is resilient to any node being added/dropped. Additional nodes added with autoscaling will be able to automatically join the cluster. Nodes leaving the cluster must be triggered by autoscaling to avoid data loss. The scripts make sure that nodes are removed only when data is fully replicated. The script does this by sending an SQS message with the node ID that will be terminated. The each node polls SQS for its own message, and once the node finds an SQS message for itself, it first checks for data migrations. If no migrations are occurring, its data is fully replicated in the cluster and node removal is safe. If there are data migrations occurring, then node shutdown is unsafe, and the node will not be removed.
By default, Aerospike port 3000 is open globally (0.0.0.0/0). You may want to lock this down to just your own IP range. As Aerospike Community Edition does not include security, you will certainly want to change this default, or use Aerospike Enterprise Edition.
Pricing
The Aerospike AMI contains only free and open source software. You will be prompted to subscribe to the AMI before this CF template can be used if you deploy directly from CloudFormation. Pricing is entirely the standard AWS cost of instances. Please see EC2 pricing here.